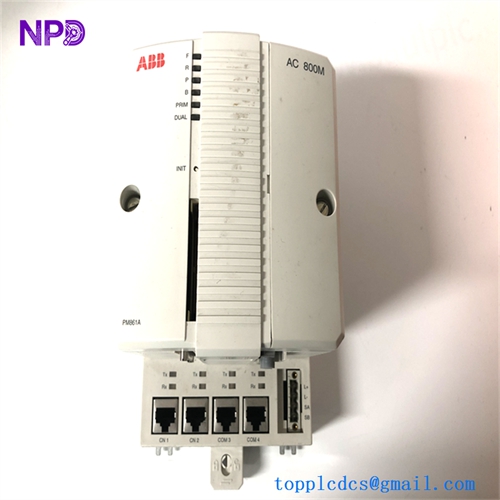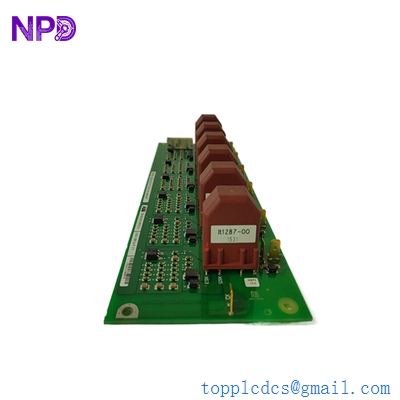

Description
- Model: 88UM01E (often associated with 88UM01E-E)
- Ordering Code: GJR2368500R1
- Brand: ABB (Germany)
- Series: Procontic DP800 / Advant Controller
- Core Function: Drive unit interface and control module for industrial automation systems.
- Product Type: Drive Control Module (Tested & Fully Operational)
- Key Specs: Multi-channel interface | Integrated logic processing | Rack-mounted 6U format.
- Part Number: GJR2368500R1
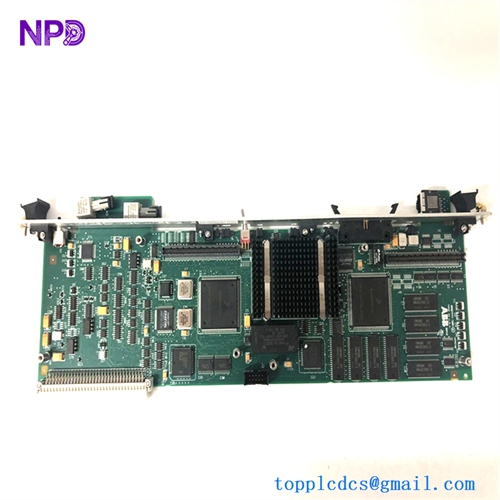
- System Compatibility: Primarily used within the ABB Procontic DP800 and early Advant series automation platforms.
- Function: Acts as the intelligent link between the central processing unit (CPU) and variable speed drives or motor power stages.
- Communication: High-speed internal bus connection (CEX or proprietary DP800 backplane).
- Inputs/Outputs: Dedicated channels for speed feedback, torque reference, and drive status monitoring.
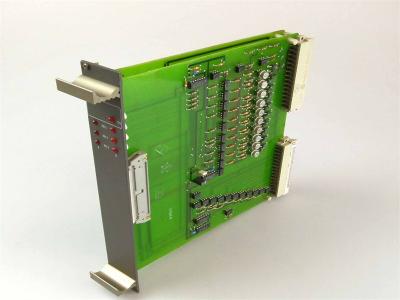
- Form Factor: Standard Eurocard plug-in module, designed for high-density industrial sub-racks.
- Diagnostics: Front-panel LED indicators for “Run,” “Fault,” and “I/O Status.”
- Isolation: Galvanic isolation between control logic and the drive power interface to prevent noise interference.
88UM01E
Installation & Commissioning Guide
Phase 1: Preparation (Pre-Installation)
⚠️ Safety First:
- De-energize: Ensure all power to the sub-rack and the connected drives is disconnected. Residual energy in drive capacitors can damage control electronics during insertion.
- Compatibility: Verify that the revision (e.g., E-E) matches your existing system hardware tree to avoid firmware mismatch errors.
- ESD Protection: Use a grounded wrist strap. The 88UM01E contains high-density logic chips sensitive to static discharge.
Phase 2: Removal of Faulty Module
- Cable Audit: Label and disconnect any front-panel connectors (e.g., serial links or pulse encoders).
- Unlocking: Loosen the top and bottom retaining screws on the front panel.
- Extraction: Pull the module straight out using the handles. Do not rock the board horizontally, as this can damage the backplane connector pins.
Phase 3: New Module Installation
- Pin Inspection: Visually check the 96-pin DIN connector on the rear for any bent pins or oxidation.
- Seating: Slide the 88UM01E into the designated slot. Push firmly until you feel the connectors fully engage.
- Fastening: Secure the front panel screws to ensure a proper ground connection to the rack chassis.
Phase 4: Commissioning & Testing
- Power-Up: Apply control power. The “Power” or “Run” LED should illuminate.
- Initialization: The system CPU should recognize the module during the boot sequence. If a “Module Fault” appears, check the slot address settings.
- Drive Synchronization: Verify that the speed and torque values on the HMI match the physical drive response.
Customer Cases & Industry Applications
Case 1: Restoring a Steel Rolling Mill Production Line
Situation: A steel mill in Eastern Europe experienced a failure in their main motor control rack. The 88UM01E module responsible for coordinating the speed of three synchronized rollers failed, leading to a complete production halt.
Task: The Procontic DP800 system is legacy hardware, and the mill’s local supplier quoted a 16-week lead time for a refurbished unit.
Action: We provided a “Tested Working” 88UM01E from our stock. The module had undergone full functional testing in a simulated rack environment prior to shipping.
Result: The module was delivered and installed within 5 days. The mill returned to full production, avoiding millions in lost revenue. The customer noted: “The availability of this specific legacy module saved us from an emergency system upgrade we weren’t ready for.”
Case 2: Precision Tension Control in a Paper Mill
Situation: A paper mill’s winding machine was suffering from inconsistent tension, resulting in frequent paper breaks. Troubleshooting revealed intermittent signal processing errors within the 88UM01E drive unit.
Task: The maintenance team required a high-reliability replacement that was guaranteed to work upon arrival to minimize the risk during the swap-out.
Action: We supplied a revision-matched GJR2368500R1. Our testing protocol ensures that all I/O channels and bus communications are verified under load.
Result: After swapping the module, the tension control stabilized. The mill now keeps an additional 88UM01E from us in their on-site “Critical Spares” inventory.
Frequently Asked Questions (FAQ)
Q: What does “Tested Working” mean for this module? A: Our 88UM01E units undergo a multi-point inspection. We power the board in a Procontic rack, verify communication with the CPU, and test the integrity of the drive interface channels to ensure they meet original factory specifications.
Q: Is the 88UM01E-E compatible with the standard 88UM01E? A: Generally, yes. The “-E” suffix typically denotes a specific hardware revision or firmware variant used in later production runs. In most cases, they are backward compatible, but we recommend checking your specific system manual.
Q: Why choose this over a “Refurbished” board? A: Many “Refurbished” boards are simply cleaned. Our “Tested Working” units are verified in actual application environments, ensuring that the high-speed logic and drive-triggering circuits are fully functional.
Q: Does it come with mounting hardware? A: It comes as a complete plug-in module. The mounting screws are integrated into the front panel of the unit.
Q: How do I troubleshoot a “Red Fault” LED? A: A red LED usually indicates a bus communication error or an internal watchdog timeout. Ensure the module is seated properly and that the backplane power (+5V, +/-15V) is within tolerance.