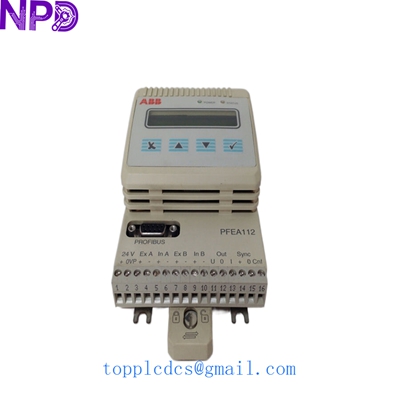
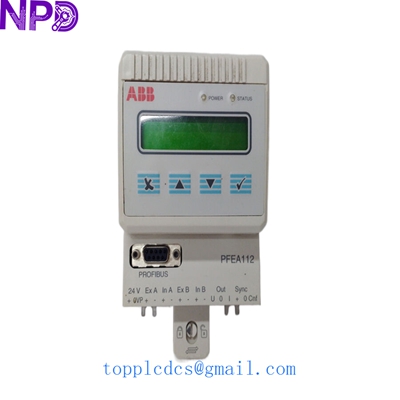

Description
- Model: PFEA112-20
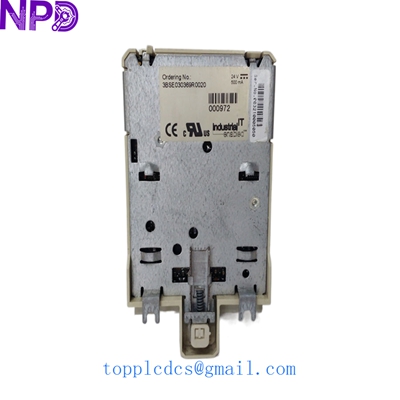
- Part Number: 3BSE050091R20
- Brand: ABB (Force Measurement)
- Series: Tension Electronics PFEA Series
- Core Function: Signal processing for Load Cells (Pressductor Technology)
- Product Type: Tension Electronics Unit (Advanced Version)
- Key Specs: IP20 Protected | Supports 2 Load Cells | Profibus-DP Interface | 24V DC
- Number of Load Cells: Supports up to 2 Load Cells (A and B).
- Power Supply: 24 V DC (18–35 V DC).
- Communication: Profibus-DP (High-speed fieldbus integration).
- Analog Outputs: 2 configurable outputs (0–10 V, 0/4–20 mA) for tension display or drive control.
- Analog Inputs: 1 input for gain scheduling or external setpoint.
- Digital I/O: 4 Digital Inputs and 4 Digital Outputs (configurable for alarms/status).
- Display: Integrated back-lit display with 4-button user interface.
- Protection Class: IP20 (Designed for cabinet mounting).
- Load Cell Compatibility: Primarily used with ABB PillowBlock, MiniBlock, and Radial Load Cells.
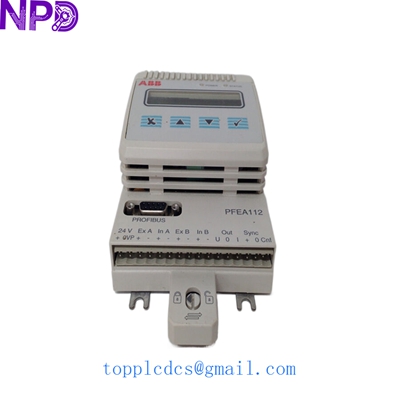
ABB PFEA112-20 3BSE050091R20
Installation & Configuration Guide
Stage 1: Pre-Installation
⚠️ Safety Checklist:
- Mounting Environment: The PFEA112-20 is an IP20 unit. It must be mounted in a clean, dry, vibration-free electrical cabinet.
- Load Cell Type: Ensure your load cell’s nominal load and sensitivity are known. This version is designed for ABB’s Pressductor® based sensors.
- Cabling: Use shielded twisted pair cables for load cell signals to prevent Electromagnetic Interference (EMI) from nearby VFDs.
Required Tools:
- DIN-rail (35mm) for mounting.
- Small flat-head screwdriver for terminal blocks.
- Multimeter for signal verification.
Stage 2: Hardware Wiring
Steps:
- DIN-Rail Mounting: Snap the unit onto the rail. Ensure there is enough space for cable routing at the top and bottom.
- Load Cell Connection: Connect Load Cell A and Load Cell B to the specific input terminals. If only using one load cell, check the manual for the jumper/software setting to disable the second input.
- Profibus Connectivity: If using the bus, ensure the Profibus connector is properly terminated at the end of the line.
- Power: Connect 24 V DC. Double-check polarity; reversing power can blow the internal protection fuse.
Stage 3: Setup & Calibration
Steps:
- Language & Units: On first power-up, select your language and preferred units (N, kN, lb, or kg).
- Enter Load Cell Data: Input the nominal load (found on the load cell nameplate) into the “Nominal Load” parameter.
- Zero Set (Tare): Ensure the web is removed and the rollers are free. Execute the “Zero Set” function to calibrate the mechanical weight of the roller.
- Calibration: Perform a “Hanging Weight” calibration if possible, or use the “Data-calculated” calibration if the physical geometry is precisely known.
Stage 4: Testing & Commissioning
Validation:
- Display Check: Rotate the roller manually. The tension reading on the display should respond smoothly and return to zero.
- Analog Output: Measure the 4–20 mA output signal. Verify that 4 mA corresponds to zero tension and 20 mA corresponds to your programmed maximum tension.
- Profibus Link: Check the Profibus master (PLC) to ensure the PFEA112 node is “Active” and data is being received.
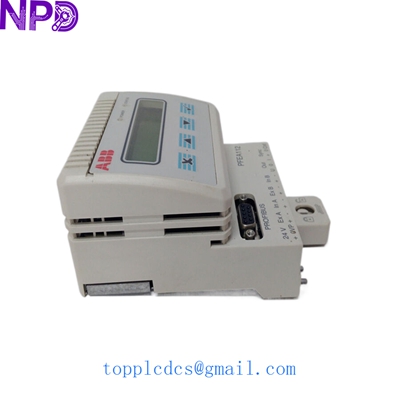
ABB PFEA112-20 3BSE050091R20
Customer Cases & Industry Applications
Case 1: Paper Mill Web Tension Stability
Situation: A high-speed paper machine was experiencing frequent web breaks during speed transitions. The existing tension electronics were drifting, causing unstable torque commands to the drive system.
Task: Replace the aging unit with a high-accuracy PFEA112-20 to utilize the Profibus-DP interface for faster controller response.
Action: We supplied the 3BSE050091R20. The customer used the Profibus link to feed tension data directly into their ABB AC800M controller.
Result: The digital integration eliminated analog signal noise. Web breaks were reduced by 25%, and the mill reported much tighter tension control during acceleration phases.
Case 2: Steel Strip Rolling Line Replacement
Situation: A steel processing line had an older tension unit fail due to a power surge. The facility needed a replacement that was compatible with their existing PillowBlock load cells.
Task: Provide a “Plug-and-Play” replacement to minimize production downtime.
Action: We delivered a New Surplus PFEA112-20. Since the customer had saved their previous parameters, they were able to re-enter the calibration data and be back in production in under 2 hours.
Result: The line resumed operations with zero downtime beyond the shipping interval. The customer now stocks an extra unit to prevent future emergencies.
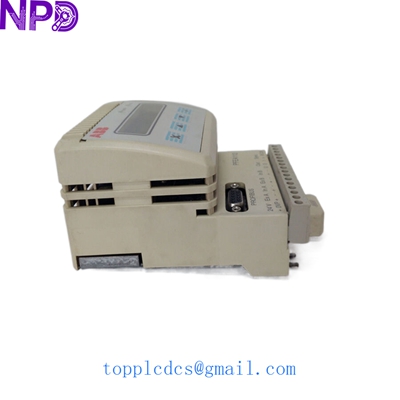
ABB PFEA112-20 3BSE050091R20
Frequently Asked Questions (FAQ)
Q: What is the difference between PFEA111 and PFEA112? A: The PFEA112 is the “Advanced” version. It includes the Profibus-DP interface and support for more complex gain scheduling and signal processing than the basic PFEA111 model.
Q: Can I use this with non-ABB load cells? A: This unit is specifically designed for ABB Pressductor® load cells (which use electromagnetic induction). It is generally not compatible with standard strain-gauge load cells without a specialized converter.
Q: Does “IP20” mean I can mount it on the machine? A: No. IP20 means it has no protection against water and minimal protection against dust. It must be installed inside an IP54 or better rated electrical enclosure if it is near the production line.
Q: How do I troubleshoot a “Load Cell Error” message? A: In my experience, 90% of these errors are due to a broken shield or a loose wire in the junction box. Disconnect the load cell and measure the resistance of the primary and secondary windings; they should match the values in the ABB technical manual.
Featured Inventory List (Current Stock)
- ABB 3BSE018161R1 (PM866)
- ABB 3BSE050198R1 (PFEA113)
- Bently Nevada 3500/22M
- TRICONEX 3503E
- GE IS215UCVEH2AE
- Honeywell CC-PAIH01
- Siemens 6ES7 417-4XT07-0AB0
- Allen-Bradley 1756-L75
For more details on these parts, visit our catalog at newplcdcs.