
Description
- Model: BENTLY NEVADA 106M1081-01
- Brand: Bently Nevada (Baker Hughes)
- Series: 3500 Machinery Protection System
- Core Function: Transient Data Interface (TDI) for System 1 software communication
- Type: Communication & Interface Module
- Key Specs: Supports Ethernet/USB | High-speed data collection | Static/Transient data
- Part Number: 106M1081-01 (Main Processor Card)
- System Slot: Occupies the slot next to the power supplies (Left side of rack)
- Communication Protocols: TCP/IP, USB, and Serial (Internal)
- Data Collection: Supports 20 channels of static data and 20 channels of dynamic data
- Interface: 10BASE-T/100BASE-TX Ethernet
- Operating Temperature: -30°C to +65°C (-22°F to +150°F)
- Software Compatibility: Bently Nevada System 1 & 3500 Configuration Software
- LED Indicators: OK, TX/RX, TM (Test Mode), and Config
- Power Consumption: 10.5 Watts typical
- Regulatory: CE, ATEX, and CSA Class I, Div 2 certified
BENTLY 106M1081-01
Installation & Configuration Guide
Preparation (Est. Time: 20 minutes)
⚠️ Safety Protocol:
- The 106M1081-01 TDI is the “brains” of the communication system. Removing it will stop data flow to System 1, but it will not stop the rack from protecting the machine (the monitors handle the trips).
- Ensure you have the latest Rack Configuration Software (3500/01) and the correct cable (USB or Ethernet).
- ESD Protection: Use an antistatic wrist strap. The TDI contains high-speed processors that are extremely sensitive to static.
Removal Steps
- Software Backup: Open the 3500 Configuration Software and perform a “Connect and Upload” to save the current rack settings.
- Identification: Note the Ethernet IP address and any USB connections on the front.
- Ejecting: Locate the two ejector tabs (top and bottom) on the module.
- Extraction: Press both tabs outward simultaneously. This mechanically unseats the module from the backplane. Pull it straight out.
- Backplane Check: Ensure no pins are bent in the TDI slot.
Installation Steps
- Verify Jumpers: Check the jumper settings on the 106M1081-01 board against your manual (usually for address or security settings).
- Insertion: Slide the module into the guides.
- Seating: Push firmly until the ejector tabs snap into the closed position.
- Cabling: Plug in the Ethernet cable. If this is a new module, you may need to use the front USB port for initial IP assignment.
Testing & Commissioning
- LED Sequence:
- OK LED: Should flash during boot and then turn solid green.
- Config LED: Should be OFF (unless you are in configuration mode).
- Connectivity: Ping the module’s IP address from your System 1 server.
- Download: Open the configuration software, select “Connect,” and “Download” the saved configuration to the new module.
- System 1 Verification: Open System 1 and verify that live vibration data (waveforms/spectrums) are being updated.
BENTLY 106M1081-01
Customer Cases & Industry Applications
Case 1: Turbine Monitoring Restoration
Situation: A gas turbine at a peak-load power plant in Northern China lost its connection to the System 1 diagnostic server. The 3500 rack was still providing protection, but engineers couldn’t see the vibration orbits or spectrums.
Problem: The existing 106M1081-01 TDI had a failed Ethernet port. The OEM lead time was 12 weeks. Without data, the plant couldn’t perform the required vibration analysis for its upcoming maintenance window.
Action: We supplied a New Surplus 106M1081-01 within 24 hours. We even assisted the plant engineer over the phone to re-assign the IP address via the USB port.
Result: The connection to System 1 was restored in under 48 hours. The plant was able to capture the startup data for the turbine, ensuring the bearings were healthy after a minor trip.
Case 2: Critical Spare for a Paper Mill
Situation: A large paper mill in Southeast Asia realized their entire 3500 machinery protection fleet relied on a single type of TDI module (the 106M1081-01), but they had zero spares on site.
Action: They decided to de-risk their operation by purchasing 2 units from our stock. They chose New Surplus over refurbished to ensure the longest possible lifespan.
Result: One year later, during a lightning storm, a surge damaged the TDI in their pulp line rack. Because they had the spare on the shelf, they swapped it in 15 minutes. The maintenance manager said, “The 3,000 we spent on the spare saved us 50,000 in diagnostic downtime.”
Frequently Asked Questions (FAQ)
Q: Is the 106M1081-01 the same as the 3500/22M? A: Yes and no. 3500/22M is the “functional” model name for the TDI module. 106M1081-01 is the specific part number of the main internal processor card. When you order a 3500/22M, you are getting the 106M1081-01 assembly.
Q: Can I replace an older 3500/20 (RIM) with this 3500/22M (TDI)? A: Yes, the TDI is the modern replacement for the old RIM module. However, you will need to update your rack configuration software and possibly your I/O module at the back of the rack to take full advantage of the Ethernet capabilities.
Q: Do you sell “Refurbished” Bently Nevada modules? A: Absolutely not. In my experience, vibration monitoring is too critical for “used” parts. A refurbished board might have aged capacitors that fail during a machine startup. We only provide New Surplus—parts that were bought for projects but never installed.
Q: Do I need to re-program the whole rack if I change the TDI? A: You need to download the configuration to the TDI so it knows which monitors are in the rack. As long as you have a backup of the .3500 file, it’s a 5-minute process. If you don’t have a backup, we can help you upload the config from the existing monitors.

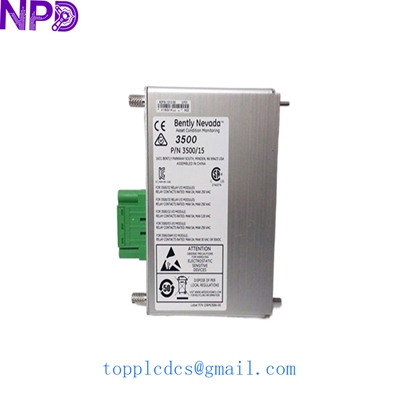
BENTLY 3500/15 106M10793500/15 106M1081-01-01
Other Inventory Items Available
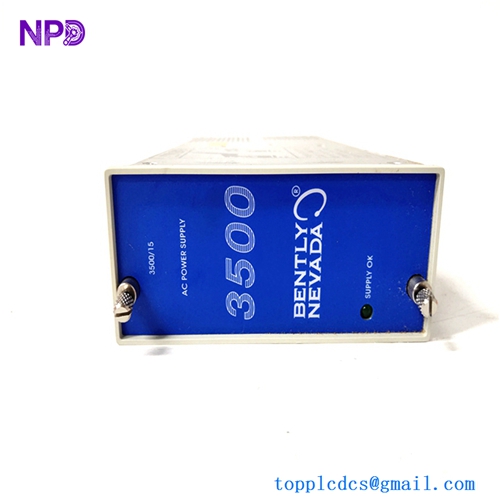
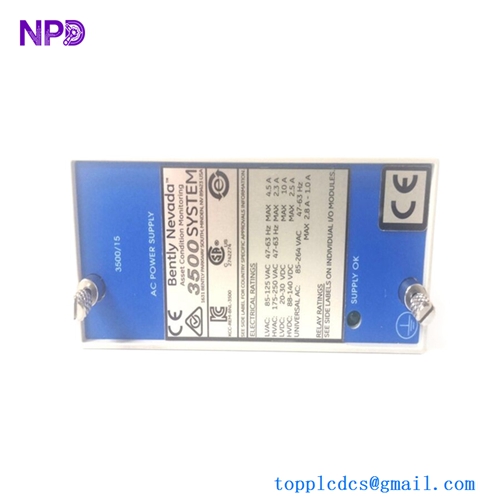
- BENTLY NEVADA 3500/15 (Power Supply 127610-01)
- BENTLY NEVADA 3500/42M (Proximitor Monitor 176449-02)
- BENTLY NEVADA 3500/25 (Keyphasor Module)
- ABB PM866K01 (AC800M Controller)
- HONEYWELL CC-PAIH01 (High Level AI)
- EMERSON KJ3222X1-BA1 (DeltaV MQ Controller)
- GE IC695CPU315 (RX3i CPU)
- TRICONEX 3008 (Main Processor)