Description
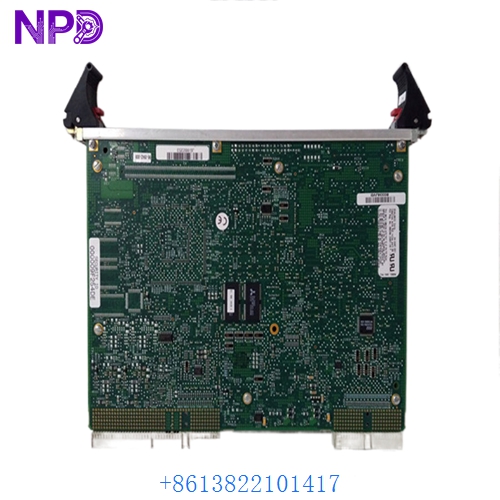
- Model: GE DMV2400A-CPCI
- Brand: GE (General Electric) / GE Fanuc / Abaco Systems
- Series: Digital Media Video (DMV) / CompactPCI Series
- Core Function: High-speed digital video and data processing interface
- Type: CompactPCI (cPCI) Processor/Interface Card
- Key Specs: 6U Form Factor, cPCI Bus Compliant, Integrated Video I/O
-
- Bus Architecture: CompactPCI (cPCI) 6U Form Factor
- Processor: High-performance embedded RISC/DSP architecture
- Video Input/Output: High-resolution digital video streaming capabilities
- Memory: On-board high-speed SDRAM and Flash for local firmware
- Input Voltage: +5 V DC, +3.3 V DC (Standard cPCI backplane)
- Front Panel: I/O connectors for high-density video/data signals
- Operating Temp: 0°C to +55°C (Commercial/Industrial grade)
- Storage Temp: -40°C to +85°C
- Hot Swap: Supports cPCI Hot Swap Specification (PICMG 2.1)
- Cooling: Forced air cooling required (Standard rack airflow)

GE DMV2400A-CPCI
GE DMV2400A-CPCI
Installation & Configuration Guide
Phase 1: Preparation (15 minutes)
⚠️ Safety Warning: The DMV2400A-CPCI is a precision electronic instrument used in high-end imaging or simulation. Even though cPCI supports “Hot Swap,” I strongly recommend performing the initial installation with the rack power OFF to avoid configuration mismatches or signal glitches.
Required Items:
- Grounded anti-static wrist strap and ESD mat.
- Phillips #1 screwdriver (for front panel captive screws).
- cPCI System Management software (to verify card recognition).
Phase 2: Hardware Installation (10 minutes)
Steps:
- Slot Verification: Ensure you are inserting the card into a peripheral slot that supports the cPCI bus signals required by the DMV2400A-CPCI.
- Alignment: Align the card with the upper and lower guide rails of the 6U rack.
- Insertion: Slide the GE DMV2400A-CPCI toward the backplane. When the connectors make contact, use the top and bottom injector/ejector handles simultaneously to lock the board into place.
- Fastening: Tighten the two captive screws on the front panel to ensure a proper EMI ground and prevent accidental ejection.
Phase 3: System Integration (25 minutes)
The Configuration Process:
- Boot Check: Power on the rack. Watch the status LEDs on the front panel of the DMV2400A-CPCI. A “Healthy” state is usually indicated by a solid green or extinguished “Fail” LED.
- Driver Load: If you are using Windows NT/2000 or a VxWorks environment, ensure the specialized GE Fanuc DMV drivers are installed.
- Signal Calibration: Use your video processing software to “Ping” the card. In my experience, if the video feed is grainy or “tearing,” it’s often a cabling issue or a clock synchronization mismatch in the software settings.
- Relay Check: Verify the data throughput. High-resolution video can saturate the cPCI bus—ensure no other cards are competing for high-priority interrupts.
Customer Cases & Industry Applications
Case 1: Medical Imaging Diagnostic System
Situation: A European hospital utilized a legacy GE cPCI system for MRI image reconstruction. The primary GE DMV2400A-CPCI card failed, halting all diagnostic procedures. Task: Find a brand-new replacement for a component that had been out of production for years. Action: We supplied a New Surplus unit from our climate-controlled warehouse. Result: The imaging system was restored within 3 days. The hospital avoided a $500,000 capital expenditure on a completely new MRI reconstruction rack.
Case 2: Military Flight Simulator Upgrade
Situation: A defense contractor was maintaining a fleet of flight simulators that relied on the DMV series for cockpit display rendering. Task: Secure a reliable “Life-of-Type” spare parts inventory to ensure 100% uptime for trainee pilots. Action: The contractor purchased our remaining stock as a strategic reserve. Result: They have successfully extended the simulator’s lifespan by another 5 years, avoiding the massive software porting costs required for modern PCI Express hardware.
Frequently Asked Questions (FAQ)
Q: Does the DMV2400A-CPCI support “Hot Swap”? A: Yes, it is compliant with the PICMG 2.1 Hot Swap specification. However, this also requires that your backplane and operating system (like VxWorks or specialized Linux kernels) are configured to handle live insertion and removal events.
Q: What is the difference between “cPCI” and standard “PCI”? A: CompactPCI (cPCI) uses the same electrical bus as standard PCI but in a ruggedized, Eurocard form factor with high-density pin-and-socket connectors (like the J1/J2 headers you see on the back of the DMV2400A-CPCI). It’s designed for 24/7 industrial and military use.
Q: Why is “New Surplus” better than “Refurbished” for video cards? A: Video and image processing modules generate significant heat. A “refurbished” card has already undergone thousands of thermal cycles, which can lead to micro-fractures in the solder joints (BGA chips). A “New Surplus” card has never been powered on, providing the maximum possible lifespan.
Q: Can I get technical support for the configuration? A: While we provide the hardware and ensure it passes all functional tests, we recommend consulting a system integrator for deep-level software programming. However, we can provide any available datasheets or pin-out diagrams we have on file.
Q: Does it come with the original software/drivers? A: These cards typically ship as “Hardware Only.” Most users already have the system software. If you need specific legacy drivers, please let us know, and we can check our archives to see if they are available for download.