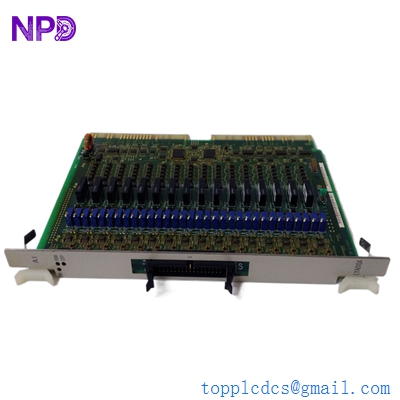
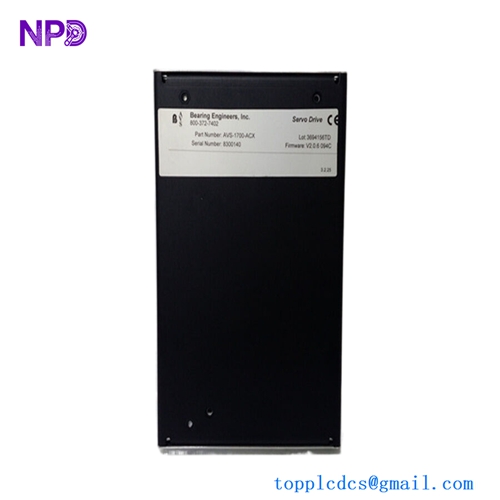
Description
- Model: KEBA IP706
- Brand: KEBA (Austria)
- Series: KeControl C1 / C2 System
- Core Function: Intelligent peripheral board for high-speed I/O and communication
- Product Type: Peripheral Interface Module (Intelligent I/O)
- Key Specs: 24 V DC supply, high-speed signal processing, KeBus interface
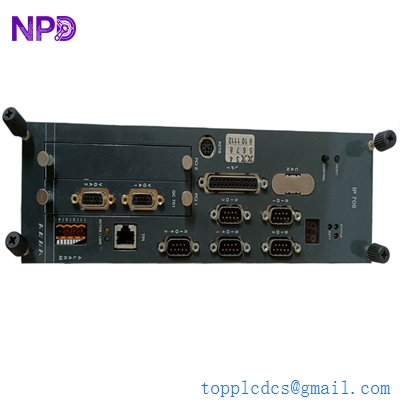
KEBA IP706
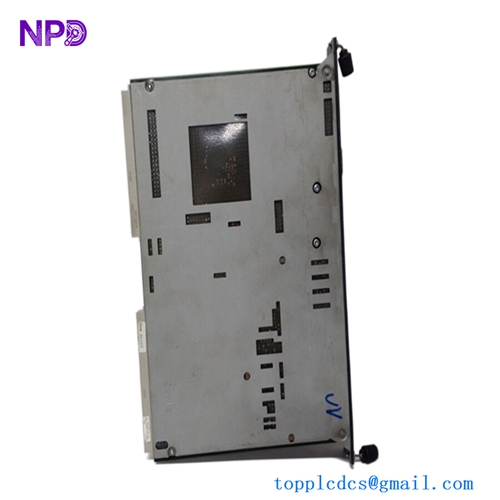
Key Technical Specifications
- Supply Voltage: 24 V DC (-15% / +20%)
- Current Consumption: Typical 150 mA (without external load)
- Interface: KeBus (Internal high-speed backplane)
- Digital Inputs: High-speed interrupt-capable inputs
- Digital Outputs: Short-circuit protected 24 V DC outputs
- Processing Power: On-board microprocessor for decentralized logic
- Status Display: Multi-color diagnostic LEDs for Power/Run/Error
- Mounting: Integrated KeControl rail/rack system
- Protection Class: IP20 (Enclosure required)
- Connectors: High-density terminal blocks for field wiring
- Galvanic Isolation: Optocoupler isolation between logic and field levels
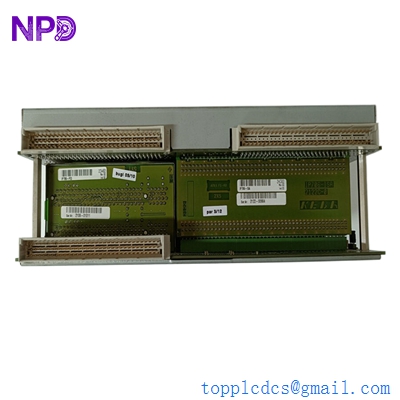
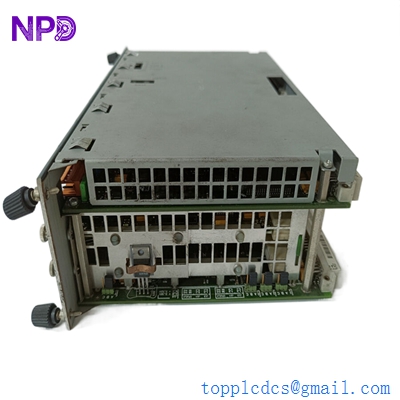
KEBA IP706
Installation & Configuration Guide
Phase 1: Pre-Installation (Estimated time: 10 minutes) ⚠️ Safety First:
- Turn off the main power switch to the KeControl CPU rack.
- Confirm the machine is at a mechanical standstill. KEBA modules often control critical hydraulics or servo axes; accidental triggering is dangerous.
- Check the version compatibility. While the IP706 is a standard module, ensure your current application software supports the firmware revision on the new board.
Phase 2: Removal (Estimated time: 5 minutes)
- Unplug Terminals: KEBA uses convenient pluggable terminal blocks. Use a small flat-head screwdriver to release the tension if they are stuck, then pull them straight out.
- Release Side Latches: Most KeControl modules use a top-and-bottom latching mechanism. Press these simultaneously.
- Slide Out: Pull the IP706 forward. Be careful not to touch the gold-plated KeBus connectors on the back.
- Note Jumpers: If there are any address jumpers or DIP switches on the side of the module, record their positions immediately.
Phase 3: Installation (Estimated time: 15 minutes)
- Duplicate Settings: Match any jumpers or DIP switches from the old IP706 to the new one. This defines the module’s “identity” on the bus.
- Alignment: Slide the module into the rack guides. Use steady, even pressure until the KeBus connector fully seats into the backplane.
- Locking: Ensure the plastic clips “click” into place. A loose module will cause intermittent bus errors that are a nightmare to troubleshoot.
- Field Wiring: Re-insert the terminal blocks. Make sure they are pushed all the way in to prevent arcing or signal loss.
Phase 4: Power-On & Testing (Estimated time: 20 minutes)
- Apply 24 V logic power.
- Watch the LEDs: The “Power” LED should be solid. The “Run” or “Bus” LED should flash and then turn solid once the CPU recognizes the module.
- I/O Force Test: Using the KEBA KeStudio software, manually force a non-critical output (like a lamp or small solenoid) to verify the hardware link.
- Check Error Logs: Look for “Peripheral Error” or “Bus Timeout” in the system log. If clean, proceed to a dry run of the machine cycle.
Customer Cases & Industry Applications
Case 1: Plastic Injection Molding Line Recovery A Tier-1 automotive supplier in Mexico had an IP706 fail on an Engel machine equipped with KEBA controls. The machine was producing bumper fascia and every hour of downtime cost thousands in missed delivery penalties. The OEM lead time was “indefinite” due to supply chain shifts. We provided a New Surplus IP706 from our local stock, air-freighting it overnight. The machine was back in production within 36 hours of the initial failure.
Case 2: Robotic Packaging Cell Retrofit A system integrator was tasked with adding a new labeling station to an existing KEBA-based packaging line. Instead of buying a completely new PLC system, they used a New Surplus IP706 to expand the I/O capacity of the current KeControl rack. This saved the end-user roughly $12,000 in hardware costs and avoided the need to rewrite the entire control architecture from scratch.
KEBA IP706
Frequently Asked Questions (FAQ)
Q: Can I replace an IP706 with an IP707 or similar? A: Generally, no. While they look identical, the internal FPGA and microprocessor mapping are different. In my experience, attempting to “upgrade” without a software engineer to re-map the KeStudio project will result in a “Hardware Mismatch” error.
Q: Does the IP706 require a separate firmware upload? A: No, the module typically inherits the necessary parameters from the main CPU (like a CP2xx or CP5xx) upon startup. However, the system software version must be compatible with the hardware revision of the IP706.
Q: Why does my “Error” LED blink red after installation? A: This usually means the module is physically fine but the “Address” doesn’t match the software configuration. Double-check your DIP switches or jumpers. If those are correct, check your 24 V field power—if the field side has no voltage, the module will report an error.
Q: Is “New Surplus” the same as “New”? A: Functionally, yes. These are original, unused parts that have been kept as spares in a climate-controlled environment. They are not “New” in the sense that they just rolled off the factory line yesterday, but they are “New” because they have zero hours of operation and have never been installed.
Q: Can I get a test report for this specific unit? A: Absolutely. We perform a power-on self-test and a KeBus communication handshake on our dedicated KEBA test rack before shipping. We can provide photos or a video of the “Run” LED green-lighting upon request.