Description
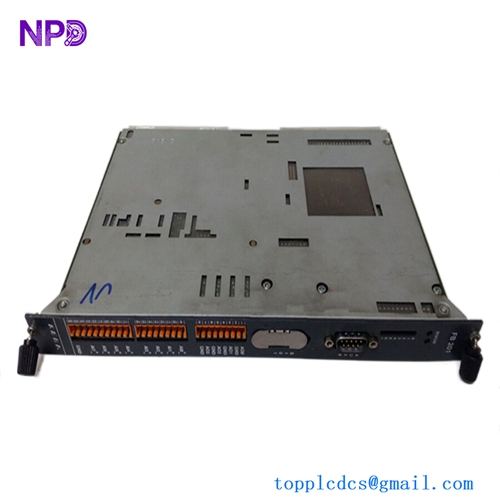
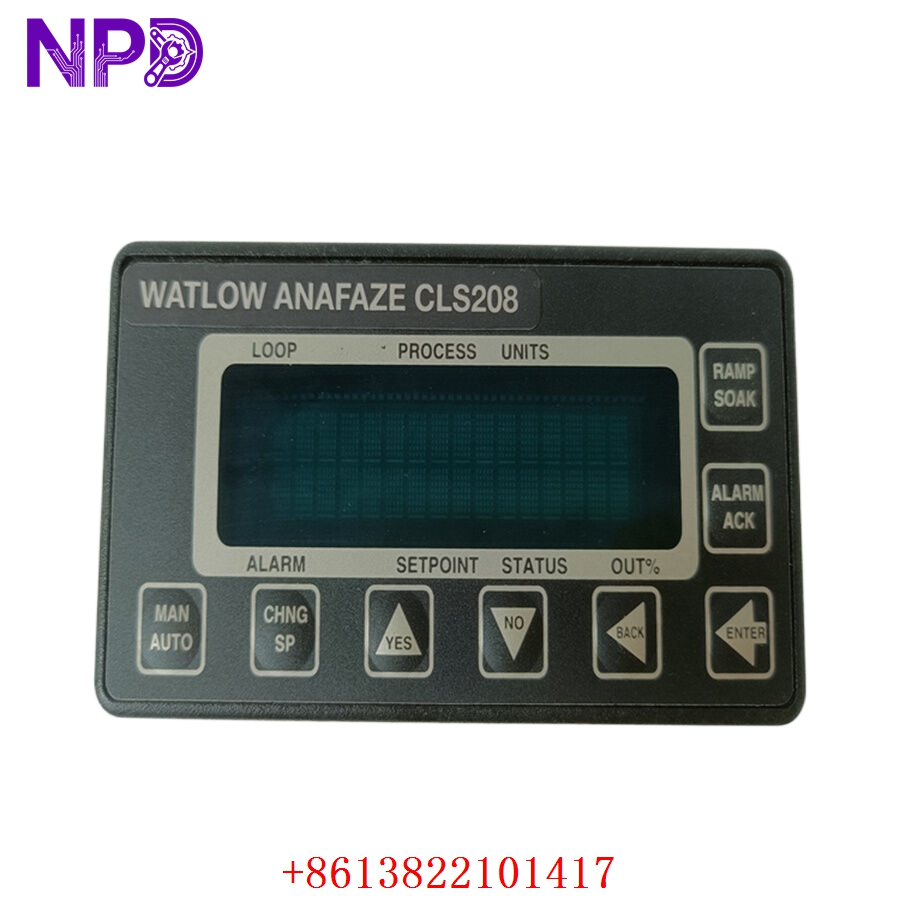
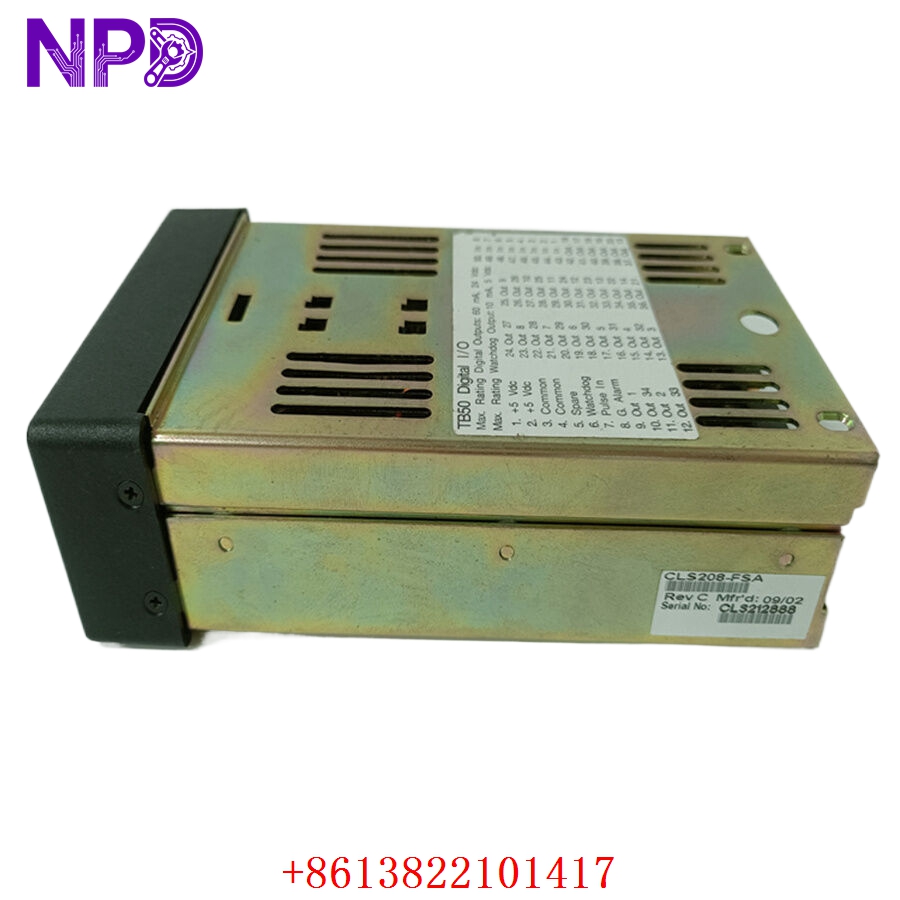
- Model: Watlow Anafaze CLS208 (Common variants include CLS208-1000-0000)
- Brand: Watlow Electric Manufacturing Company / Anafaze (USA)
- Series: CLS200 Multi-Loop Controller Series
- Core Function: Provides 8 independent loops of high-precision PID temperature and process control in a compact, panel-mount package, Original New Surplus condition
- Type: 8-Channel Multi-Loop PID Controller
- Key Specs: 8 Universal Inputs (TC, Linear) | Up to 34 Outputs via expansion | Backlit LCD screen | RS-232/RS-485 Serial Comms
- Input Channels: 8 independent, universal inputs supporting Thermocouples (Type J, K, T, R, S, B, E, N), RTDs, or linear DC millivolt/milliamp signals
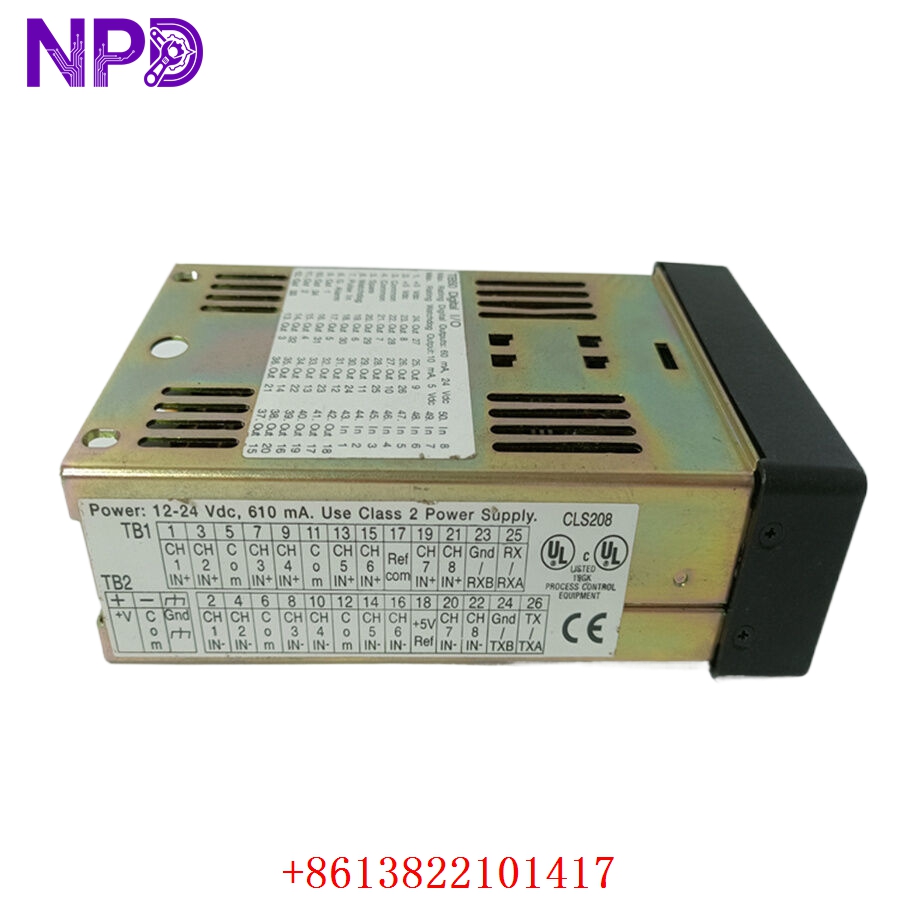
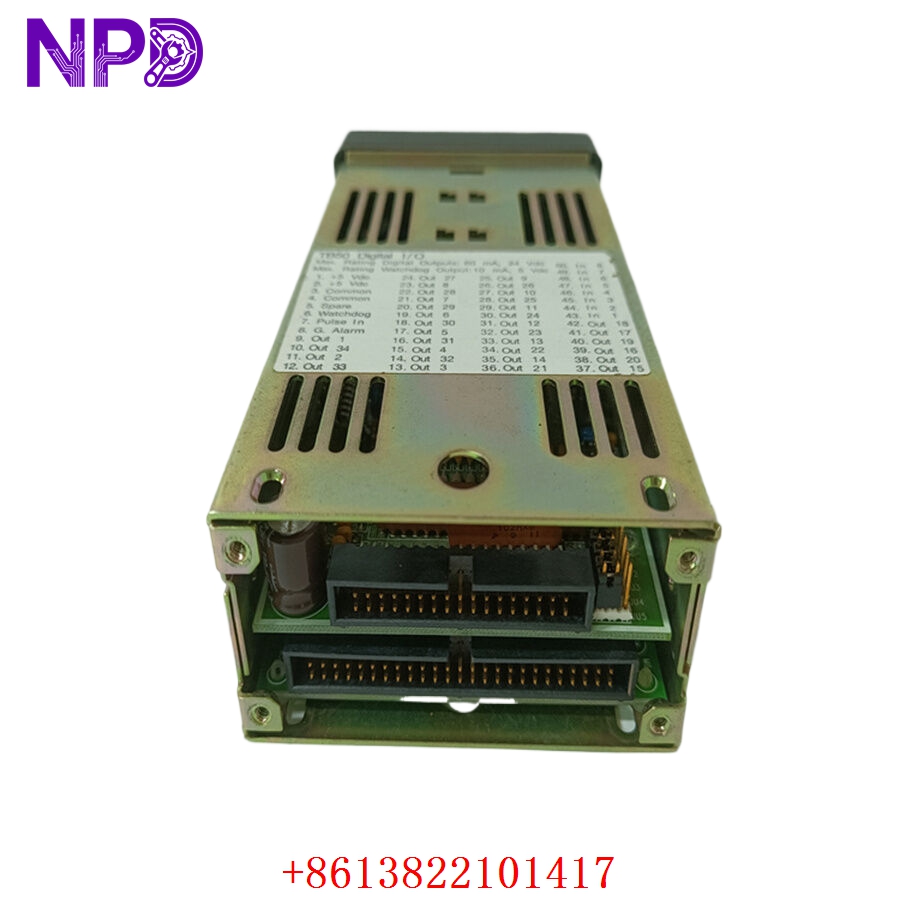
- Output Capacity: Configurable base outputs expanded via external digital output boards (dual-dac, mechanical relay, or SSR drivers) up to 34 total outputs
- Control Algorithms: Full PID (Proportional, Integral, Derivative) loops, Auto-tune capable, On/Off control, and heat/cool loops
- Display Interface: Integrated 2-line by 16-character backlit LCD display panel with tactile front keypad
- Operating Supply Voltage: 12 to 24 V DC (\pm10\%) external power requirement
- Communications: Built-in serial link supporting RS-232 and RS-485 configurations using Anafaze or Modbus RTU protocols
- Data Retention: Non-volatile EEPROM memory safeguards recipe parameters, calibration profiles, and loop tuning without battery backup
- Operating Ambient Limits: 0 °C to +50 °C (32 °F to 122 °F), 0% to 90% non-condensing relative humidity
- Enclosure Rating: NEMA 12 front panel equivalent when flush mounted using correct compression hardware
Part 4: Installation & Configuration Guide
Phase 1: Pre-Installation (Estimated Time: 15 minutes)
⚠️ Safety First:
- Coordinate with production supervisors to bring the heating zones or industrial processing machinery (e.g., plastics extruder, packaging line) to a safe, controlled shutdown.
- Disconnect and lock out the primary electrical distribution breaker panels feeding the heating element contactors and the controller’s 24V DC auxiliary power supply line.
- Apply standard Lockout/Tagout (LOTO) padlocks and tags to prevent accidental re-energization during maintenance.
- Wait a minimum of 10 minutes for all active heating zones to cool to a safe handling level before working around sensors and high-voltage wiring blocks.
Tool Preparation:
- Anti-static wrist grounding strap and an ESD-safe workspace mat
- Miniature precision flathead screwdriver (2.0 mm blade) for terminal blocks
- Phillips screwdriver for panel mounting clamps
- Fluke 115 Digital Multimeter
- Thermal wire strippers and wire labels
- Smartphone camera for structural reference photos
Backup Procedures:
- CRITICAL: If the old controller’s display is still readable, navigate through the menus using the front keypad and record all PID parameters (P, I, D values), input scaling limits, alarm thresholds, and output assignments for all 8 loops. Write these parameters into a physical commissioning log.
Phase 2: Removal (Estimated Time: 10 minutes)
Steps:
- Use your multimeter to verify that zero voltage remains active across the input power terminals on the back of the controller chassis.
- Unplug the high-density terminal blocks from the rear of the CLS208 housing. Take photos to verify the orientation and labels of sensor shields, thermocouple wires, and output controls.
- Loosen the metal panel-mounting brackets or side adjustment screws clamping the controller to the panel cutout.
- Slide the square controller chassis forward through the front front-panel cutout space.
- Clean away any degraded foam gaskets, dust accumulation, or chemical film residue around the perimeter of the panel cutout hole.
⚠️ Key Notes:
- Pay close attention to the thermocouple extension wire polarities (typically white is positive and red is negative for US standard Type J/K lines). Inverting these wires will cause the controller to read ambient temperatures backward on start-up.
Phase 3: Installation (Estimated Time: 20 minutes)
Steps:
- ESD Protection: Connect your anti-static wrist strap to a grounded chassis rail before opening the sealed antistatic packaging containing the new surplus CLS208 controller.
- Check Model Match: Verify that the hardware suffix codes match your original module to ensure proper internal input/output board configurations.
- Mount Housing: Slide the controller through the front panel cutout. Ensure the integrated sealing gasket is aligned flush against the panel face to block dust entry.
- Secure Brackets: Install the side-mounting brackets onto the channels along the outer housing shell. Tighten the lock screws evenly until the unit is rigidly fixed against the sheet metal panel framework.
- Reconnect Wiring: Re-seat the terminal block strips into the backplane pin sockets. Double-check your reference photos to ensure sensor shields and loop wires land on their original pins without loose copper whiskers.
Self-Check Checklist:
- [ ] Sealing gasket sits flush under the front display bezel with no wrinkles
- [ ] Thermocouple extension line polarities (+ and -) match channel terminal maps perfectly
- [ ] Ground shield wires are securely bonded to prevent electromagnetic interference (EMI)
- [ ] Panel mounting clamps are hand-tightened completely with zero shifting play
Phase 4: Power-On & Loop Configuration (Estimated Time: 25 minutes)
Pre-Power Checks:
- Probe the primary isolated 24 V DC input terminals with your multimeter to check for any low-resistance shorts to ground before throwing the supply switches.
Configuration Loading Steps:
- Turn on the 24V DC auxiliary power supply breaker to initialize the controller.
- Observe Display Initialization: The backlit LCD should light up instantly, running an internal self-test routing before displaying the primary loop readouts.
- Program Input Types: Press the menu key to access the hardware setup screen. Configure each of the 8 channels for its specific sensor input type (e.g., Type K thermocouple or 4-20mA linear input) to match your field gear.
- Manual Parameter Input: Use the arrow keys to manually enter the PID coefficients, alarm low/high limits, and cycle times that you logged from the decommissioned unit during Phase 1.
- Auto-Tune Execution (If Parameters Are Unknown): If old parameters are unavailable, bring the process up to a moderate safe temperature, navigate to the tuning menu, and select Auto-Tune. Allow the controller to cycle the outputs and automatically calculate optimized P, I, and D values for the zone.
- Verify that the communications baud rates and station address match your upstream PLC or HMI workstation network. Monitor live data tracking for 15 minutes before re-engaging automated heating elements. Record the new serial number in your maintenance database.
Part 5: Customer Cases & Industry Applications
Case 1: Urgent Extrusion Line Recovery at a Plastics Processing Facility
Situation:
A plastics extrusion facility in the Midwest was running a continuous profile production run when their primary multi-loop controller failed. The legacy Watlow Anafaze CLS208 module managing 6 independent barrel heating zones suffered an internal power surge, causing the display to go dark and all heating loops to drop offline.
Task:
Without precise temperature regulation across the barrel zones, the plastic resin would quickly cool and solidify inside the screw assembly, risking catastrophic mechanical damage upon restart and costing the plant thousands of dollars in lost throughput and scrapped material. Sourcing a current-generation alternative would require completely redesigning the enclosure panel and rewriting the HMI communication logic, adding weeks of downtime.
Action:
The plant’s maintenance manager contacted our emergency response desk to locate a direct replacement. We sourced an original new surplus Watlow CLS208 multi-loop controller within our warehouse inventory. Our laboratory technicians configured the universal inputs to match their Type J thermocouple profile, verified the display contrast, and shipped the component via overnight priority air express.
Result:
- Downtime minimized: The replacement controller arrived at the facility early the following morning. The shift electrician swapped the hardware and transferred the PID settings in under 30 minutes.
- Production Restored: The unit initialized cleanly, brought the barrel zones back to their proper thermal setpoints, and enabled the extrusion line to resume normal operations ahead of schedule.
- Customer Voice: “Finding an un-used, factory-clean CLS208 controller on short notice saved us from an absolute nightmare scenario. It dropped directly into our panel cutout, recognized our network lines instantly, and has been running smoothly ever since.”
Case 2: Preventive Spares Allocation for an Industrial Packaging Operation
Situation:
A high-volume consumer goods packaging plant relies on multiple legacy Watlow Anafaze panels to manage sealing bar temperatures across several automated wrapping lines. Each line utilizes a CLS208 controller to regulate multiple independent heating elements simultaneously.
Task:
Recognizing that Watlow had moved this product platform into obsolete lifecycle status, the engineering group flagged the aging controllers as a potential single point of failure for the main assembly line. They needed to secure a reliable backup unit to eliminate risk, but rejected used or refurbished options due to strict corporate reliability standards.
Action:
The procurement manager contacted us to locate authentic, un-used surplus inventory. We provided a brand-new surplus CLS208 controller inside its original factory packaging, complete with clean manufacturing numbers, allowing the facility to add it directly to their critical spares inventory.
Result:
- Long-Term Protection: This strategic purchase provided the plant with a plug-and-play backup component, ensuring they can protect their production lines from unexpected downtime for years to come without requiring an expensive and un-planned full-system upgrade.
Part 6: Frequently Asked Questions (FAQ)
Q1: What is the benefit of using a CLS208 multi-loop controller over eight separate single-loop controllers?
A: The CLS208 provides significant savings in space, panel-cutting labor, and wiring complexity by consolidating 8 independent PID loops into a single compact enclosure.
Additionally, it features a single centralized communications link (RS-232/RS-485) to stream data for all 8 zones back to your master PLC or HMI network, simplifying programming compared to managing eight separate single-loop network connections.
Q2: Why does my replacement CLS208 show a “Sensor Break” or “Open” alarm immediately after wiring?
A: A “Sensor Break” error generally indicates an open circuit or high resistance along the sensor input line. On a newly installed unit, this is typically caused by:
- A loose screw terminal contact or a missing jumper wire on an unused channel.
- An inverted thermocouple wire connection (+ and – lines flipped).
- The software input configuration configuration being set to a different sensor type than what is physically wired to the terminal strip.
Verify your wiring polarities and ensure all unused channels are disabled in the setup menu to clear the error.
Q3: Can I hot-swap the CLS208 module while the industrial heating loops are live?
A: No, you should never unplug or hot-swap this controller while your heating loops are energized. Pulling the terminal blocks or disconnecting power while the unit is actively regulating can cause unexpected electrical arcing across the pins, potentially damaging the internal input/output cards.
More importantly, losing the control signal instantly causes the heating loop contactors to drop out or lock open, which can lead to runaway thermal conditions or immediate process safety trips. Always completely isolate system power before swapping hardware.
Q4: Why buy a New Surplus Watlow controller instead of a cheaper refurbished option online?
A: Refurbished CLS208 controllers are typically salvaged from older, decommissioned production plants. Third-party repair shops often clean the outer casing, fix broken keypad buttons, or replace failed display backlights, but they leave aged internal voltage regulators and processing components in place. These old components are prone to failing unexpectedly when subjected to continuous thermal variations inside a live electrical panel.
Our New Surplus units are authentic, un-used components stored in climate-controlled warehouses. They provide factory-original component lifespans and come backed by a full 12-month warranty, providing reliable process control without the risks of refurbished hardware.
Q5: How do you verify the measurement accuracy of the inputs before shipping?
A: Every CLS208 multi-loop controller undergoes rigorous testing on our automated calibration benches before leaving our facility. We connect the unit to a certified thermocouple simulator and input precise temperature values across all 8 channels.